Streamlining Your Development with AWS DevOps: A Guide to CI/CD Pipelines

Welcome to our blog channel dedicated to all things DevOps! We provide insights on topics such as continuous integration and delivery, automation, infrastructure as code, cloud computing, containerization, monitoring, and more. Our mission is to empower developers, operations professionals, and IT experts to adopt DevOps practices and tools that enable them to work efficiently and innovate quickly. Our in-depth tutorials, best practices, industry trends, and real-world examples of successful DevOps implementations will help you stay up-to-date with the latest in this rapidly evolving field. Let's work together to improve the world of software development, and join us in our mission to build better, faster, and safer systems!
I. Introduction:
What AWS DevOps is and why it's important for modern software development?
AWS DevOps refers to the practice of using the Amazon Web Services (AWS) platform and tools to automate and streamline the software development process, from initial code development to deployment and management in production. AWS DevOps is a set of principles and practices aimed at reducing the time and effort required to develop, test, and deploy software, while also improving its quality and reliability.
DevOps is important for modern software development because it helps organizations to rapidly and efficiently develop, test, and deploy software applications, while maintaining high levels of quality and reliability. By adopting DevOps practices, organizations can automate many of the manual tasks involved in software development, such as testing, deployment, and monitoring, which can help reduce errors and improve the overall quality of the software.
Additionally, AWS DevOps provides a range of tools and services that can help organizations to build and deploy applications quickly and easily, while also scaling their infrastructure to meet changing demands. These tools include services for continuous integration and continuous delivery (CI/CD), infrastructure as code (IaC), containerization, and serverless computing.
CI/CD pipelines and their role in DevOps:
CI/CD pipelines are an integral part of the DevOps methodology and are used to automate the software development, testing, and deployment processes. CI/CD stands for Continuous Integration/Continuous Delivery or Continuous Deployment, depending on the level of automation.
Continuous Integration (CI) is the practice of regularly merging code changes from multiple developers into a central repository and then building and testing the application automatically. This process helps to catch integration issues early in the development cycle and ensure that code changes are properly integrated with each other.
Continuous Delivery (CD) takes the process further by automating the deployment of the application to a staging environment where it is tested and validated before being released to production. This process allows organizations to deliver new features and bug fixes to their customers more quickly and with greater confidence.
Continuous Deployment (CD) takes the process even further by automating the deployment of the application directly to production once it has been tested and validated in the staging environment. This approach requires a high degree of confidence in the automated testing and deployment process, as any errors or issues could potentially impact the end-users.
CI/CD pipelines play a critical role in DevOps by enabling organizations to automate the software development, testing, and deployment processes, which reduces the time and effort required to release new features and bug fixes. This automation also helps to improve the quality and reliability of the software by catching issues early in the development cycle and ensuring that changes are properly integrated and tested before being released to production.
II. Setting up an AWS DevOps CI/CD pipeline and hosting website using nginx web-server
Walk through the steps to set up a CI/CD pipeline on AWS
Creating an AWS CodeCommit repository:
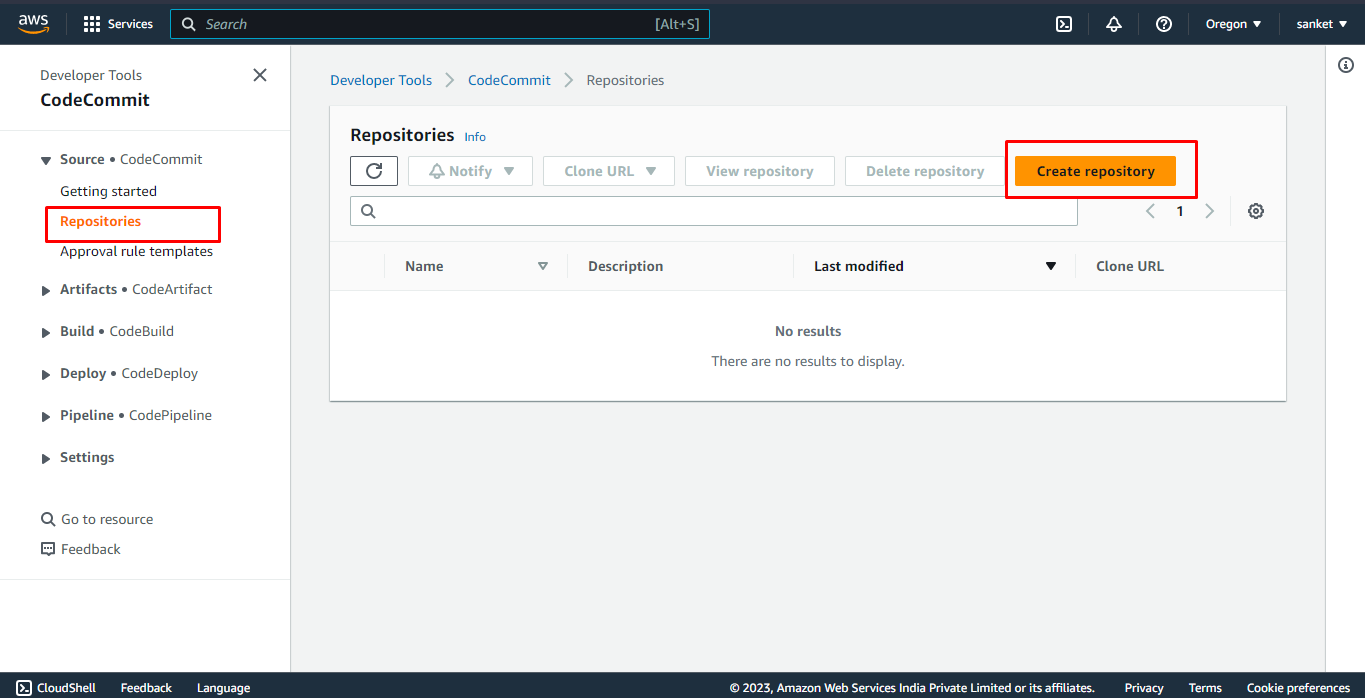
Log in to the AWS Management Console and navigate to the CodeCommit service.
Click on the "Create repository" button.
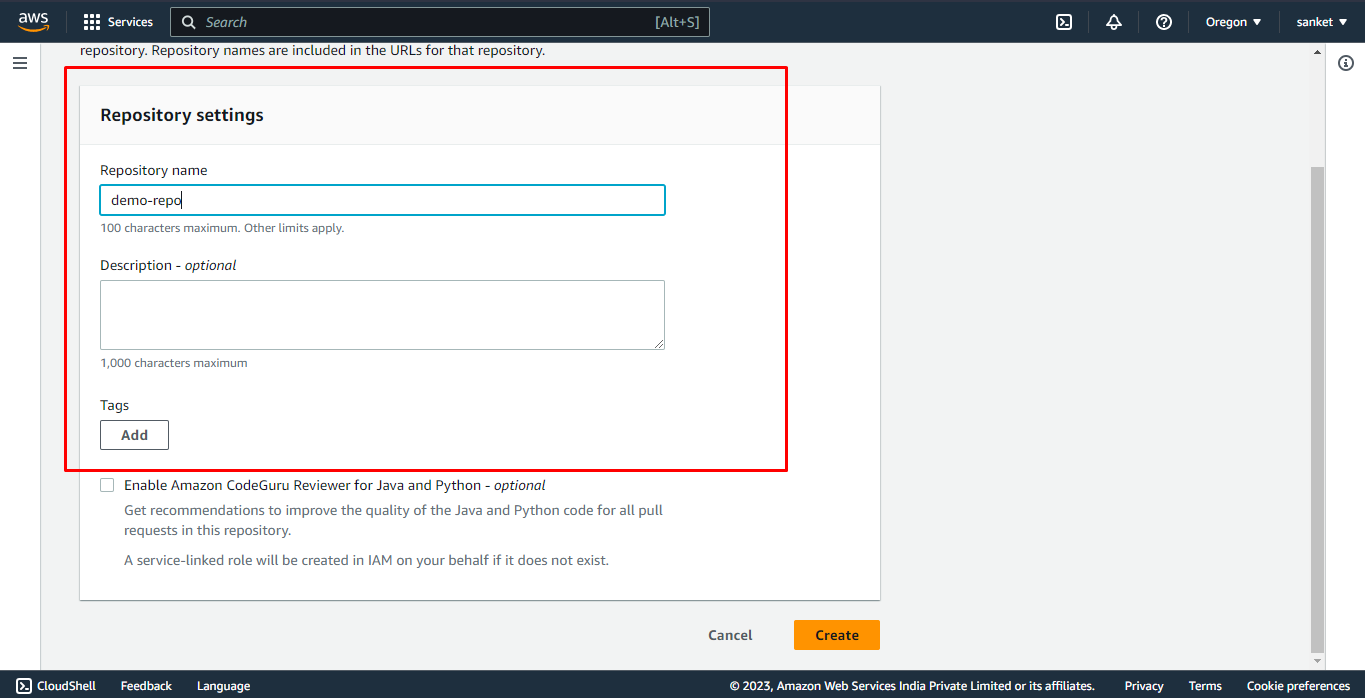
Enter a name for your repository and optionally provide a description.
You can enable the CodeGuru Reviewer for Java and Python to automatically check for potential issues with your code in these programming languages this is a optional option
Click on the "Create" button to create your repository.
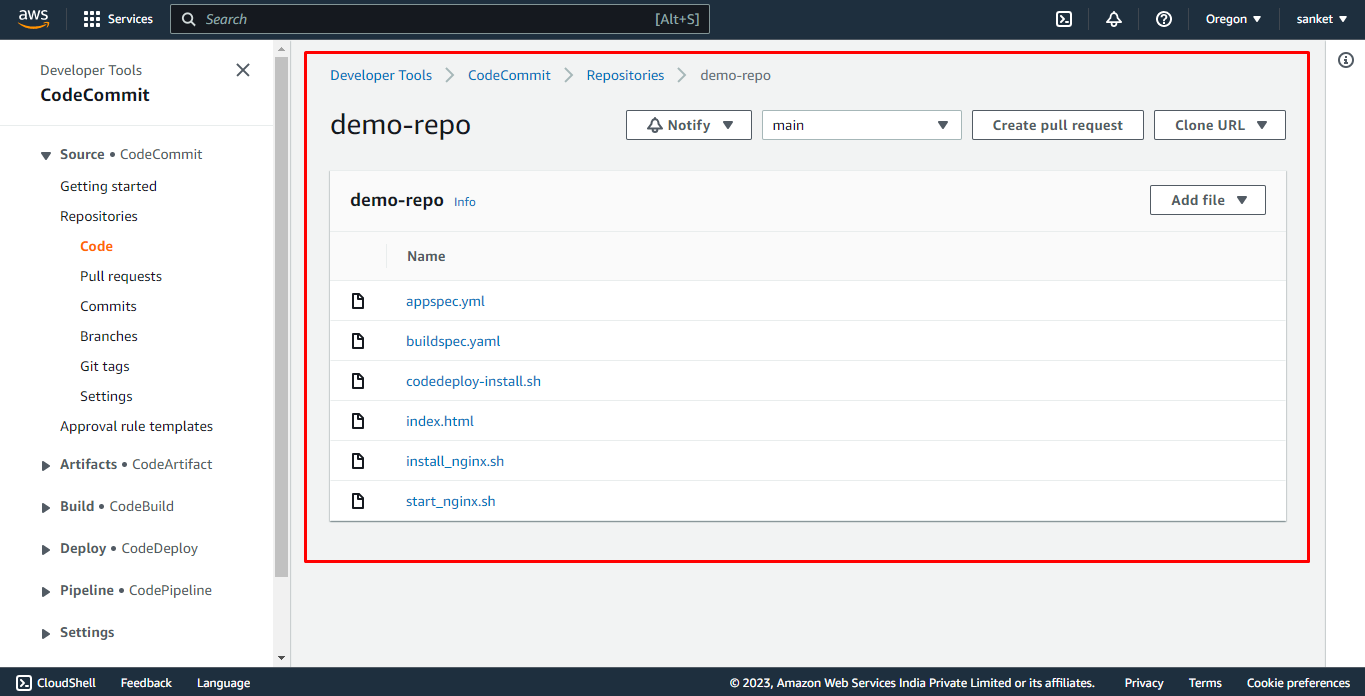
Once Repository is created it will look like the below Image
Creating a IAM User and Grant him the Access to the Repo:
Navigate to the IAM service tab in the AWS Management Console.
Click on the "Users" button on the left-hand side panel

Click on the "Add Users" button
Write the name of the "User" of your choice
In the next step, you will be on the "Set Permissions" panel
Click on the "Attach Policies Directly" to directly add the policies to the user

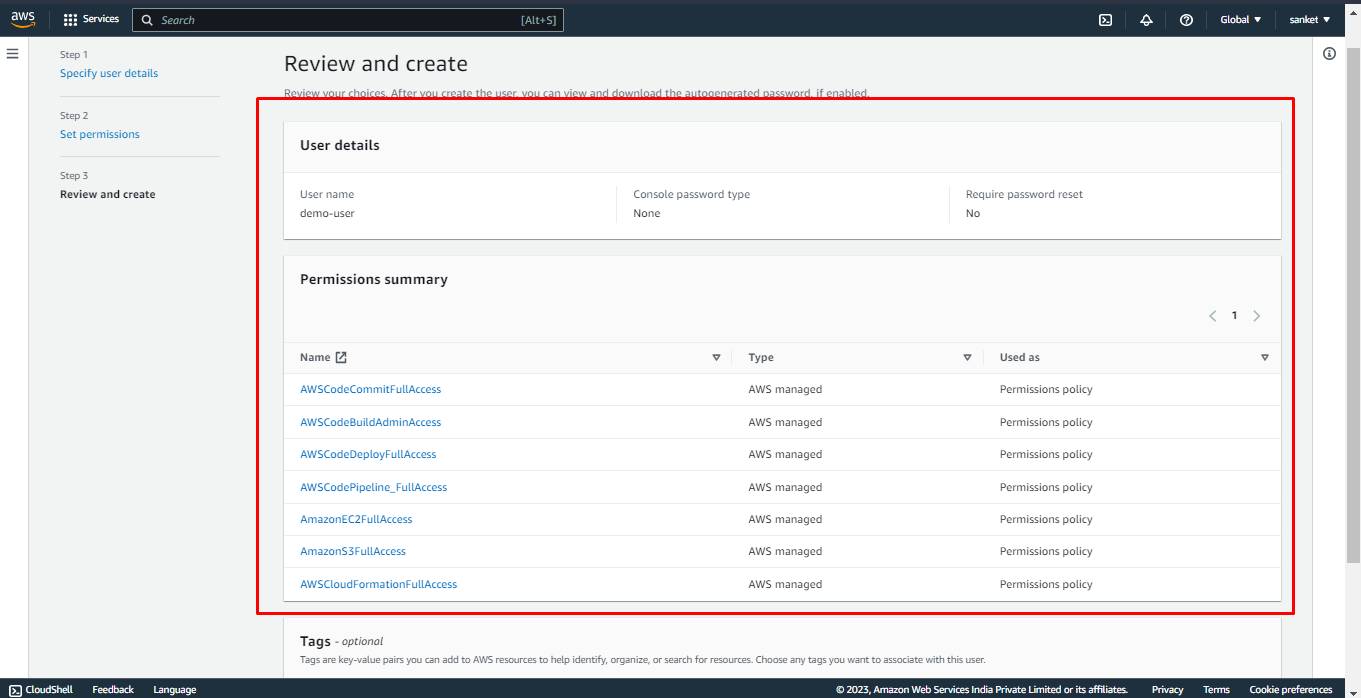
Below is the list of policies you will need for cloning the Repo and also for some future tasks
AWSCodeCommitFullAccess
AWSCodeBuildAdminAccess
AWSCodeDeployFullAccess
AWSCodePipeline_FullAccess
AmazonEC2FullAccess
AmazonS3FullAccess
AWSCloudFormationFullAccess
Review the user and Create the user like the below image
Cloning the Repository on the Local Machine:
Once you have created the repository for cloning it to the local machine you will need some more permissions
Navigate to IAM again
Click on the "Users"
Click on the User you created
Click on "Security Credentials"
Scroll Down & Find "HTTPS Git credentials for AWS CodeCommit"

Click on "Generate Credentials" once clicked you will be prompted with a username & password keep them safe with you
Navigate to "CodeCommit" service again and click on the "HTTPS" copy button that you see near your repo
Come on your local/remote machine and write the command in CLI
git clone <https-link>Once cloned now you will be prompted with
Cloning into 'demo-repo'...
warning: You appear to have cloned an empty repository.
Files needed in your Repo:
For demo purposes we are creating a CICD pipeline for the nginx web page you can always go ahead and try out your CICD projects on AWS "CodeCommit"
All the required files for the repository are mentioned here
Clone these files or copy the files to your repo and push them to the Repository on AWS
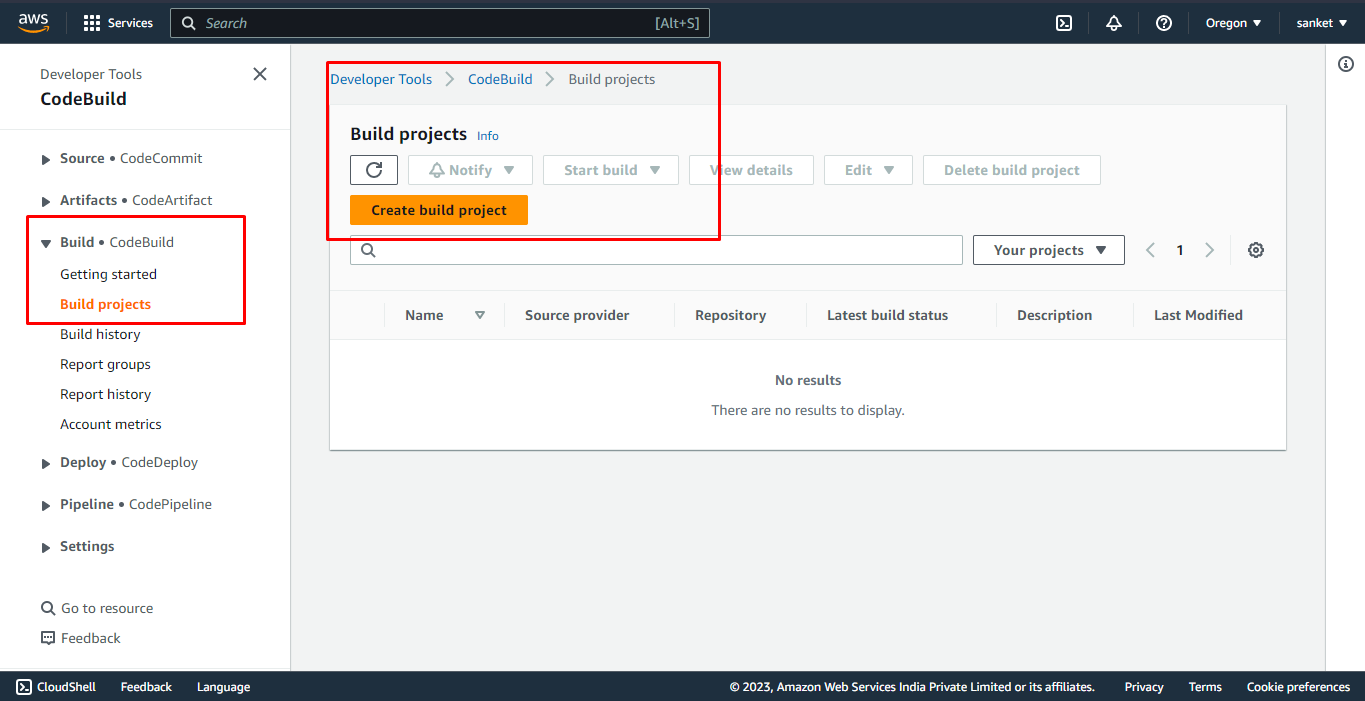
Time to Setup CI or CodeBuild in AWS:
On the CodeCommit panel scroll down and click on the "Build" button
Now click on the "Build Projects" button
Again Click on "Create build Project"
Give your project a name and add a description - optional
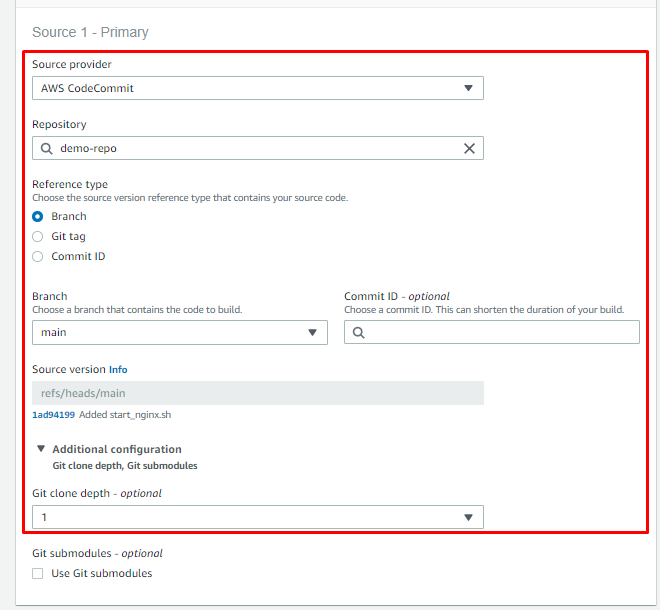
Scroll down to "Source"
Add the Source provider as "AWS CodeCommit"
Select your Repo in the Repository drop down
Select the branch
In the "Environment" Section you can select either a Managed image or any custom image i.e Docker image for this time we are selecting the managed image
Select the Operating system Ubuntu
Runtime(s) as Standard
Image as the latest one available
And keep the rest of the settings as it is

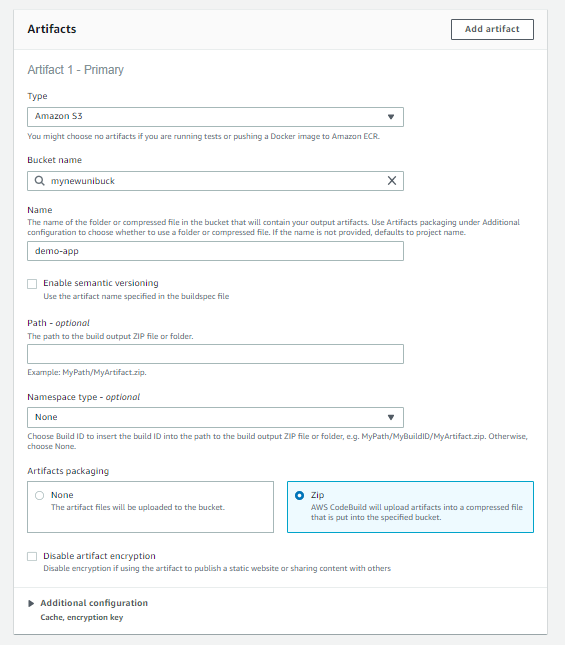
Scroll Down a bit and select the Artifacts as "Amazon S3"
Write the Bucket name for storing your artifact (Create a s3 bucket for this)
Write the S3 bucket name, Write the name of the artifact you want, and for Artifacts packaging select Zip
- Turn off the logs of Cloudwatch If you want you can Keep them enabled this will help you to monitor and get the logs of the events
- Click on Create project your project will be created
Building the project:
Once the project is created navigate inside and click on "Start Build"
Click on "Phase Details" here you can see the build stages

- Here you should see all the stages are Succeeded
Now the CI is Done Lets setup CD for your application:
Navigate to the "Deploy" option below the "Build"
Click on "Applications" and then click on Create an application

Write your application name
Select the Computational platform as EC2/On-premises

Now click on "Create Deployment Group"
Insert your Deployment group name
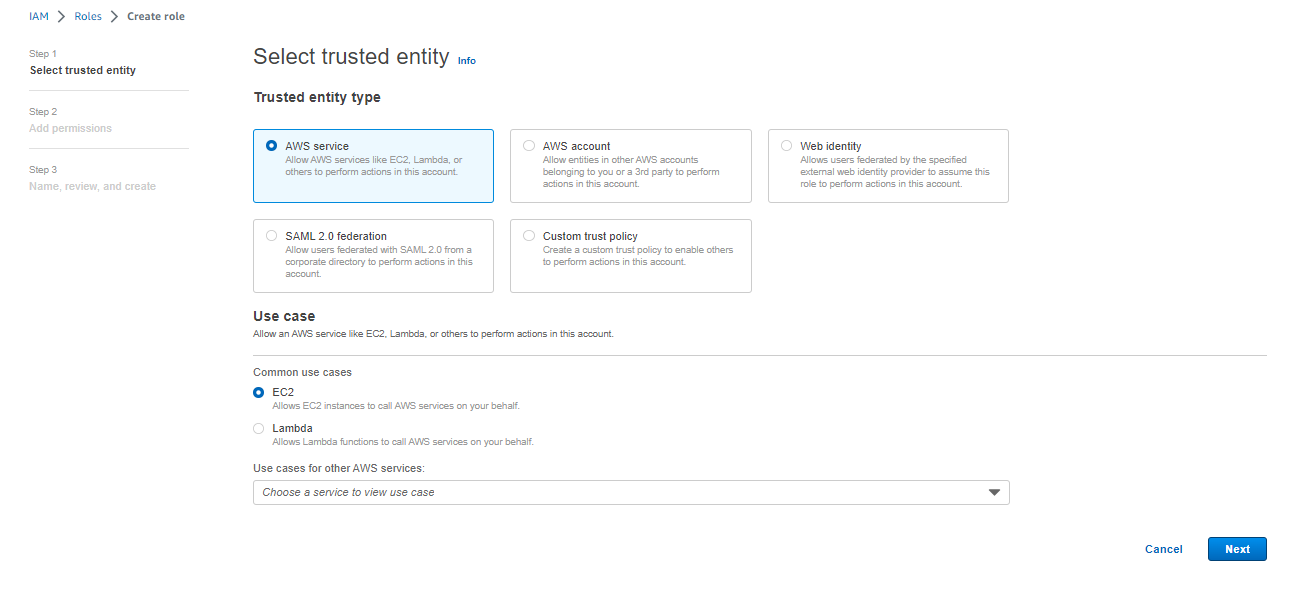
For service, role navigate to the IAM service
Click on Roles
Click on create role

Select AWS service and for the use case select Ec2
for permissions add the below permissions
AmazonEC2FullAccess
AWSCodeCommitFullAccess
AmazonEC2RoleforAWSCodeDeploy
AWSCodePipelineApproverAccess
AmazonS3FullAccess
AWSCodeDeployFullAccess
AWSCodeDeployRole
AmazonEC2RoleforAWSCodeDeployLimited
Add your role name and click on Create Role
copy the arn you see at the top

Now navigate back to the Deployment group creation
Paste the arn in the service section
In the deployment type select In-place
In Environment configuration select Amazon EC2 instance
You will need an EC2 running instance Navigate to EC2 and Create an instance also you will need aws codedeploy service running on the server
Click here you should see a bash script Copy the bash script and run the script on your newly created instance
In the bash script change the zone for eg if you are in eu-east-1 mention that in the place where "write-your-region-name" is written
Now note the name of the running server
Navigate back to the Environment Configuration and add the key and value for key add Name and for value add your running instance name


For agent Configuration select never
For Deployment, settings keep it as it is
For the load balancer you can create it but for this tutorial, we are not gonna use it so untick the check box and click on create a deployment group
Creating the Deployment
Understanding the difference between Deployment Group and Deployment:
Deployment is the process of deploying a new revision of an application or a configuration change to a set of instances
On the other hand, a deployment group is a logical grouping of instances or tags to which a deployment is targeted
So in short Deployment is the process but the deployment group is the logical grouping of instances and tags on which the deployment will be running
Let's get back to the setup
Before going to further steps once build your project again
Click on applications and then select your created application inside click on deployment group
Now click on Create Deployment
For Revision, type Select My application is stored on Amazon S3
Now navigate to S3 and click on your created bucket and you will see the package of your build click on it and copy the s3 url
Navigate back to the setting and paste the S3 url in the box provided
for the revision type select .zip
Click on create deployment
Deployment should start running
But it is in still progress it won't go ahead bcoz we haven't given the EC2 instance required permissions
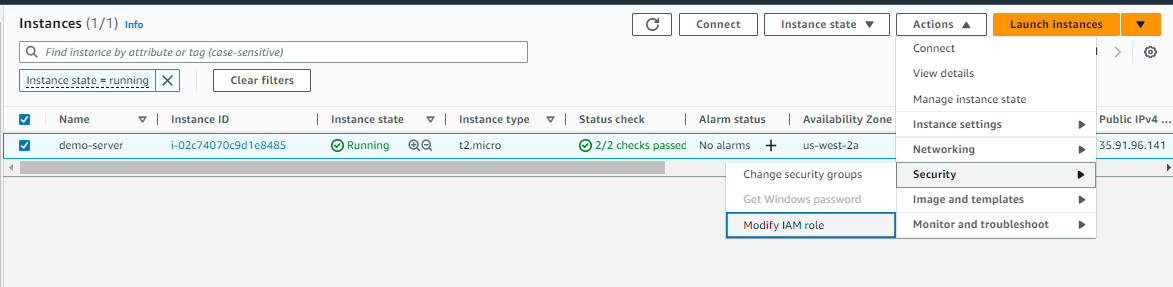
Navigate to EC2 select your running instance click on Actions select Security and select Modify IAM role
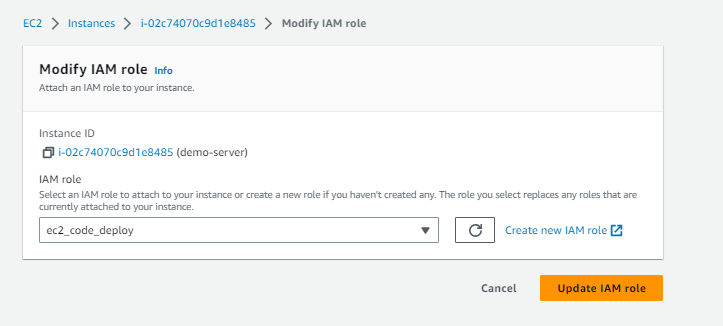
Now you will need one more role for your instance Open new window with IAM service and create a new role and add the below permissions for the role
AmazonEC2FullAccess
AmazonS3FullAccess
AWSCodeDeployFullAccess
Navigate back to the selecting role for the ec2 instance and you should see the role
- Your application should start building

- Once the build is complete you can navigate to your browser and paster your public IP of the instance you should see the following web page

Its time to Create the Pipeline for our CI & CD:
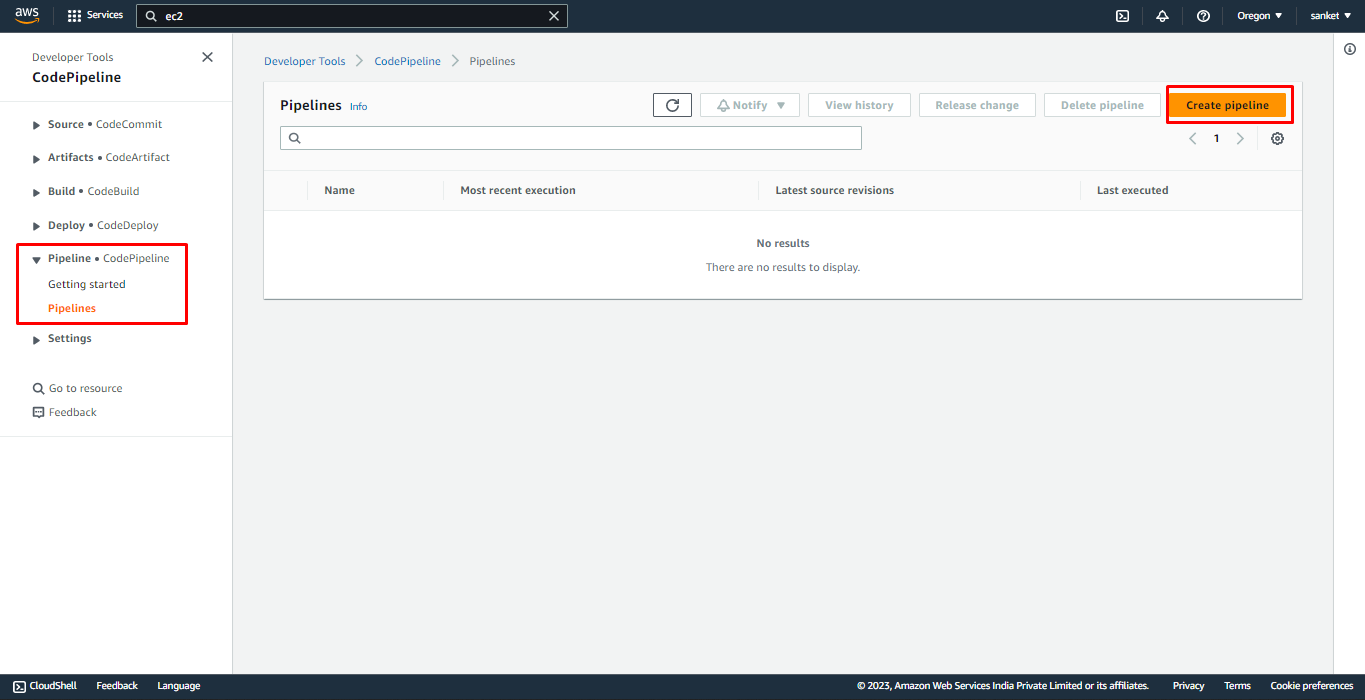
In the "CodeCommit" service scroll down and click on "Pipelines"
Click on Create Pipeline
Write your pipeline a name
Click on next
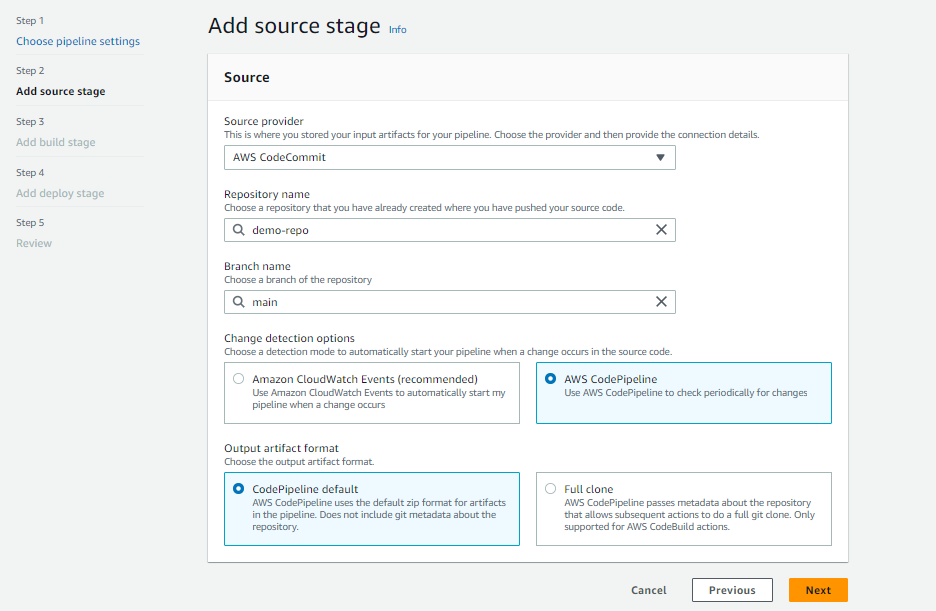
Add the Source provider as AWS Code Commit, Your repository and the Branch name
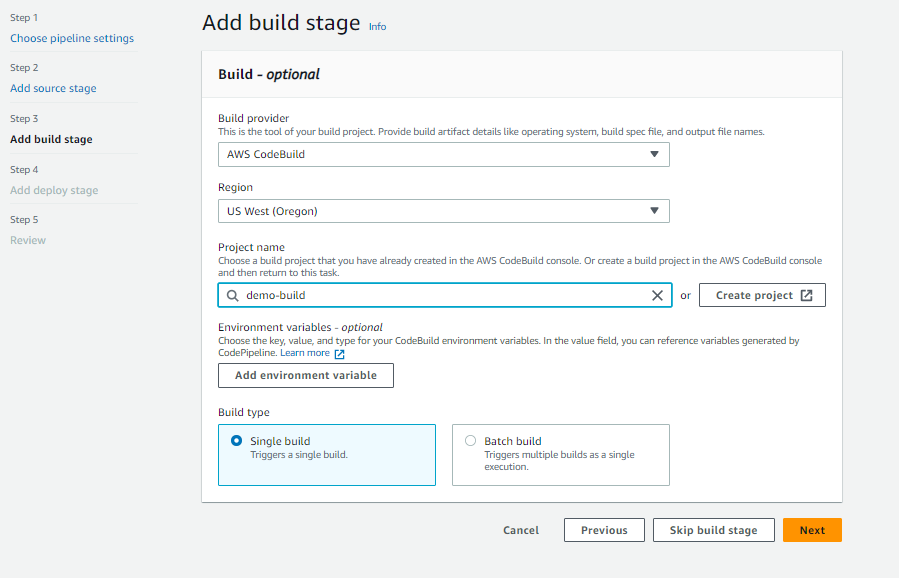
- For the build stage on the Build, provider select AWS Code Build, Region, and project name
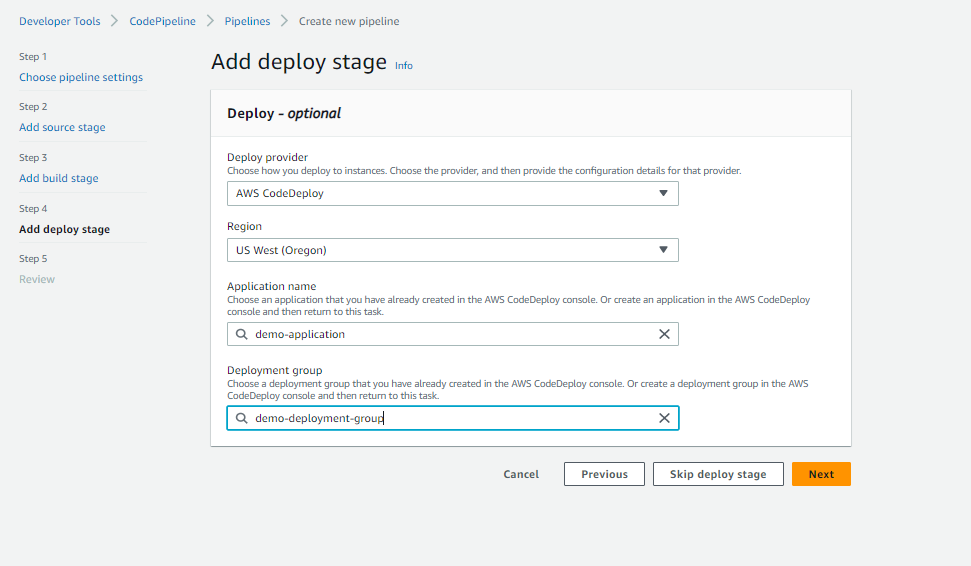
- For deploy, stage choose the deploy provider as AWS CodeDeploy, Application name, and Deployment group
Review the config and click on create
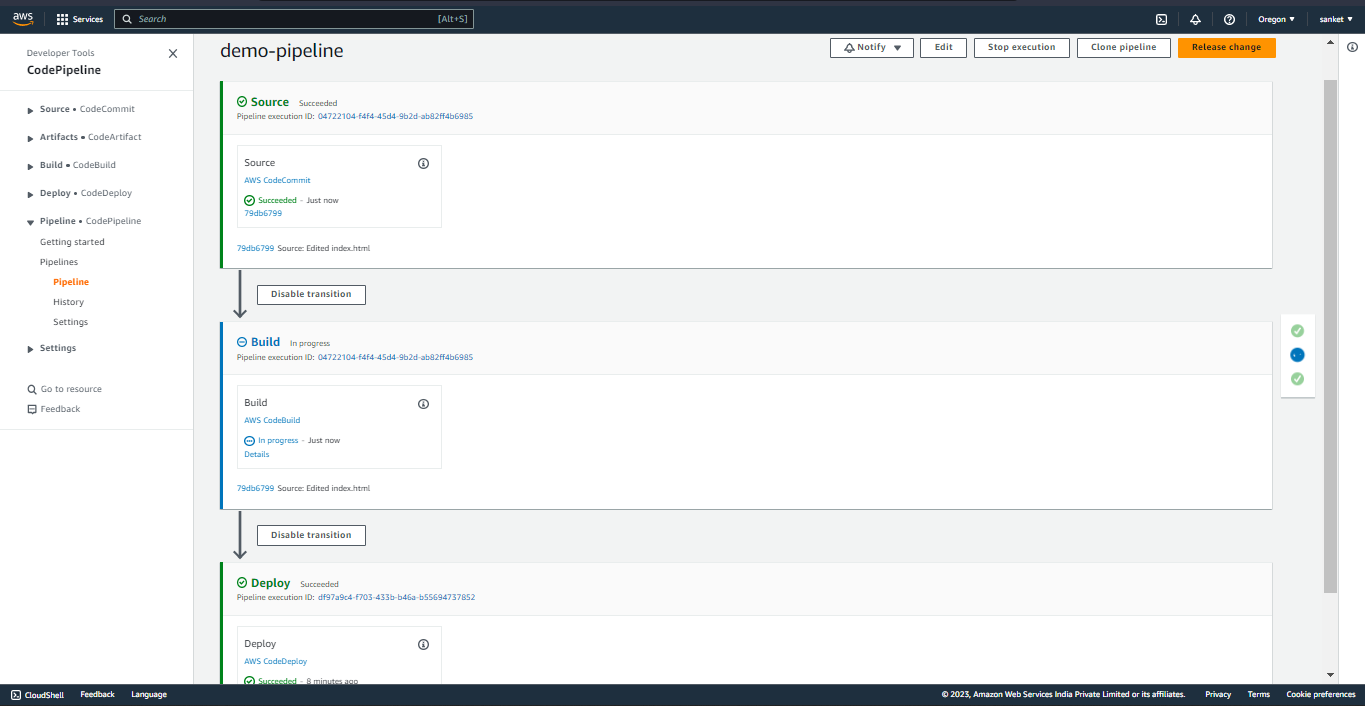
Now wait patiently and let run the source, codebuild and deploy
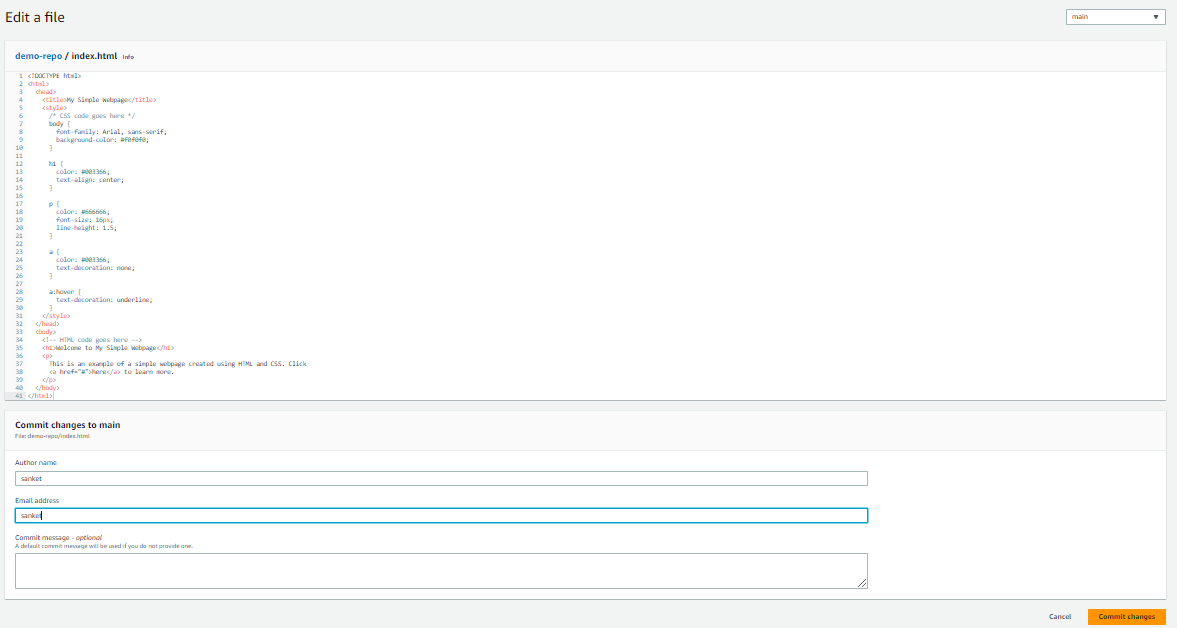
Now, let's change the index.html code. Below is the new demo code of html and css make a commit to the repo we will see if this triggers the pipeline automatically
<!DOCTYPE html>
<html>
  <head>
    <title>My Simple Webpage</title>
    <style>
      /* CSS code goes here */
      body {
        font-family: Arial, sans-serif;
        background-color: #f0f0f0;
      }

      h1 {
        color: #003366;
        text-align: center;
      }

      p {
        color: #666666;
        font-size: 16px;
        line-height: 1.5;
      }

      a {
        color: #003366;
        text-decoration: none;
      }

      a:hover {
        text-decoration: underline;
      }
    </style>
  </head>
  <body>
    <!-- HTML code goes here -->
    <h1>Welcome to My Simple Webpage</h1>
    <p>
      This is an example of a simple webpage created using HTML and CSS. Click
      <a href="#">here</a> to learn more.
    </p>
  </body>
</html>
New code inserted in index.html
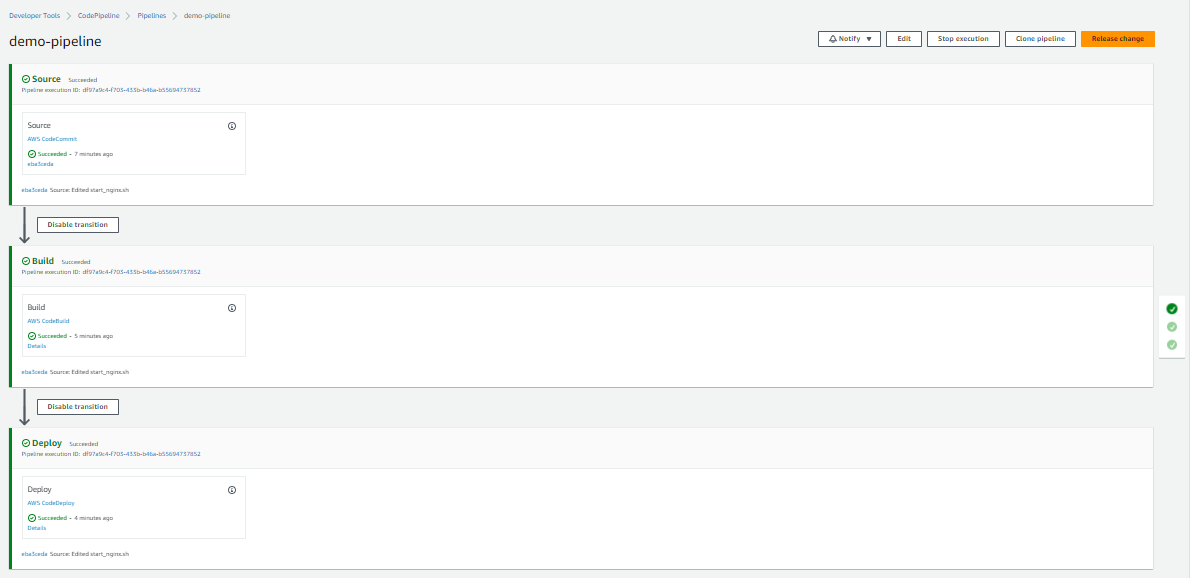
Pipeline got the change in the code and started the new build
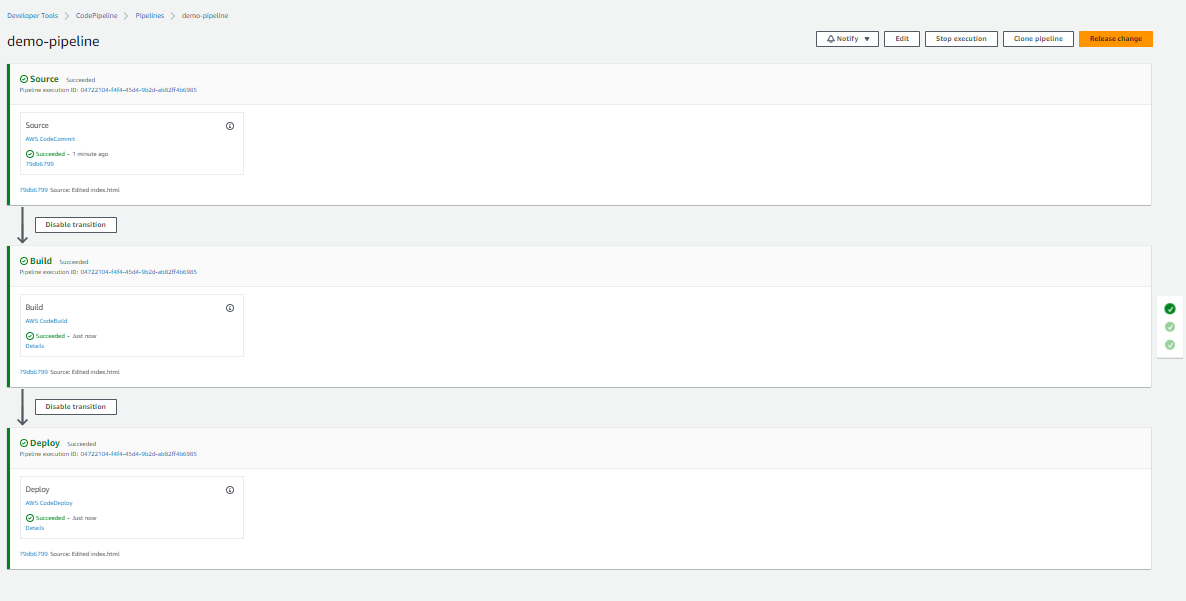
Pipeline ran successfully
Let's reload our webpage to see the changes
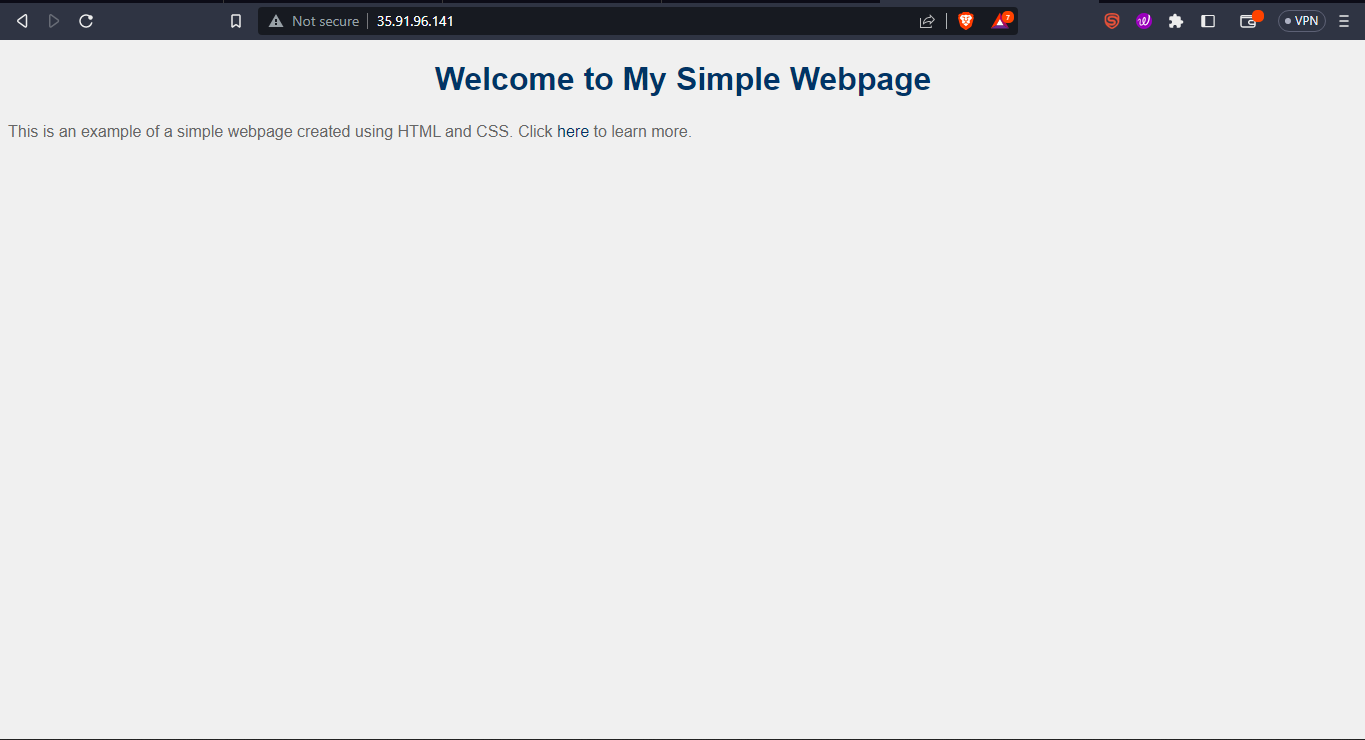
Congratulations you completely deployed a CICD pipeline in AWS. The blog is really big with too many steps and many navigations here and there but all is worth it when your pipeline runs successfully even with the change in code 😊
Hope this blog was helpful to you all to get more such blogs do follow me on LinkedIn and can ask any queries or changes you feel
III. Conclusion:
Implementing a CI/CD pipeline can help streamline your development process and improve the quality and consistency of your software releases. AWS DevOps provides a comprehensive set of tools and services to help you automate your pipeline and reduce the amount of manual effort required to deploy code changes. By following the steps outlined in this guide, you can create a robust CI/CD pipeline on AWS that integrates with your existing development workflows and delivers faster, more reliable software releases. With the right tools and processes in place, you can focus on developing new features and improving your application, while AWS DevOps takes care of the rest.


