How to Set up a CI/CD Pipeline for a To-Do Application using Jenkins: A Step-by-Step Guide


Table of contents
Requirements:
OS: Windows, IOS, Linux, or its distributions (eg: Ubuntu, Centos, RHEl, etc)
Jenkins
Docker
Docker-compose
Git & GitHub
What is CICD?
CI/CD stands for Continuous Integration and Continuous Deployment (or Continuous Delivery). It is a software development practice that aims to automate and streamline the process of building, testing, and deploying software.
Continuous Integration involves frequently merging code changes into a shared repository and running automated tests to detect errors as early as possible in the development cycle.
Continuous Deployment (or Delivery) is the practice of automatically deploying code changes to production once they pass the automated tests, with little to no human intervention.
Together, CI/CD helps teams to produce higher quality software with faster release cycles and fewer errors, by automating and standardizing the development process. Popular tools used for CI/CD include Jenkins, GitLab CI/CD, CircleCI, and Travis CI.
First Step:
The first step for the CI/CD pipeline of a to-do application would typically involve setting up the source code repository and the version control system. This step involves creating a repository on a version control platform such as GitHub, Bitbucket, or GitLab, and committing the initial codebase of the to-do application to the repository.
Once the repository is set up, you can configure a version control system such as Git to manage the codebase and track changes to it over time. This allows multiple developers to work on the same codebase simultaneously and keep track of changes made by each developer.
We have chosen GitHub as the repository for our to-do application. If you do not already have the codebase, you can easily fork or clone it from a public repository.
There are many GitHub repositories that contain the codebase for a to-do application. Some popular ones include:
Vue.js TodoMVC: github.com/vuejs/vue/tree/dev/examples/todo..
React TodoMVC: github.com/tastejs/todomvc/tree/master/exam..
AngularJS TodoMVC: github.com/tastejs/todomvc/tree/master/exam..
Ember.js TodoMVC: github.com/tastejs/todomvc/tree/master/exam..
Backbone.js TodoMVC: github.com/tastejs/todomvc/tree/master/exam..
Other repositories with minimal UI/UX can also be used, allowing you to focus more on the CICD part of the pipeline
We are using the below repository for this pipeline
https://github.com/sanket363/node-todo-cicd.git
These repositories contain the codebase for different implementations of the to-do application using various front-end frameworks and libraries. You can fork or clone the repository that matches the technology stack you are using for your own to-do application.
Second Step:
Choose a CI tool:
There are several popular CI tools available, such as Jenkins, Travis CI, CircleCI, and GitLab CI/CD. Choose the one that suits your needs and preferences.
Here is brief explanation of some of the CI Tools
Jenkins: Jenkins is an open-source CI tool that offers a wide range of plugins and integrations, making it highly customizable and flexible. It supports a variety of programming languages and tools, making it a popular choice among developers.
Travis CI: Travis CI is a cloud-based CI tool that is easy to set up and use. It has a simple configuration and offers built-in support for a wide range of programming languages and tools, including GitHub and Bitbucket.
CircleCI: CircleCI is another cloud-based CI tool that offers a simple and intuitive user interface. It has a fast build speed and offers support for multiple programming languages and tools.
GitLab CI/CD: GitLab CI/CD is a CI/CD tool built into GitLab, a popular code repository management tool. It offers a seamless integration with GitLab, making it easy to set up and use. It supports a wide range of programming languages and tools and offers powerful features such as pipelines, environments, and deploy gates.
Among the above tools we are taking the Jenkins Tool for our CICD pipeline
Below are the steps to install Jenkins on Centos & Ubuntu
Centos:
Update the package list: Start by updating the package list on your CentOS system using the following command:
sudo yum update
Install Java: Jenkins is built on Java, so you'll need to install Java Development Kit (JDK) on your CentOS system. You can install OpenJDK using the following command:
sudo yum install java-1.8.0-openjdk-devel
Add Jenkins repository: Next, add the Jenkins repository to your CentOS system using the following command:
sudo wget -O /etc/yum.repos.d/jenkins.repo https://pkg.jenkins.io/redhat-stable/jenkins.repo
Import Jenkins repository key: Import the Jenkins repository key to ensure the authenticity of the package using the following command:
sudo rpm --import https://pkg.jenkins.io/redhat-stable/jenkins.io.key
Install Jenkins: Finally, install Jenkins using the following command:
sudo yum install jenkins
Start Jenkins: Once the installation is complete, start Jenkins using the following command:
sudo systemctl start jenkins
Enable Jenkins: Enable Jenkins to start automatically at system boot using the following command:
sudo systemctl enable jenkins
Check Jenkins status: Verify the status of Jenkins using the following command:
sudo systemctl status jenkins
You should now be able to access the Jenkins web interface by opening a web browser and entering the following URL:
http://your_server_ip_or_domain_name:8080
Replace your_server_ip_or_domain_name with the IP address or domain name of your CentOS system. Follow the on-screen instructions to complete the Jenkins setup.
Ubuntu:
Update the package list: Start by updating the package list on your Ubuntu system using the following command:
sudo apt update
Install Java: Jenkins is built on Java, so you'll need to install Java Development Kit (JDK) on your Ubuntu system. You can install OpenJDK using the following command:
sudo apt install openjdk-8-jdk
Add Jenkins repository: Next, add the Jenkins repository to your Ubuntu system using the following command:
wget -q -O - https://pkg.jenkins.io/debian-stable/jenkins.io.key | sudo apt-key add -
Add Jenkins to package source list: Add Jenkins to the package source list using the following command:
sudo sh -c 'echo deb https://pkg.jenkins.io/debian-stable binary/ > /etc/apt/sources.list.d/jenkins.list'
Install Jenkins: Finally, install Jenkins using the following command:
sudo apt update
sudo apt install jenkins
Start Jenkins: Once the installation is complete, start Jenkins using the following command:
sudo systemctl start jenkins
Enable Jenkins: Enable Jenkins to start automatically at system boot using the following command:
sudo systemctl enable jenkins
Check Jenkins status: Verify the status of Jenkins using the following command:
sudo systemctl status jenkins
You should now be able to access the Jenkins web interface by opening a web browser and entering the following URL:
http://your_server_ip_or_domain_name:8080
Replace your_server_ip_or_domain_name with the IP address or domain name of your Ubuntu system. Follow the on-screen instructions to complete the Jenkins setup.
Third Step:
Configure the CI tool:
Once you have chosen a CI tool, configure it to connect with your code repository. This usually involves creating a webhook or providing the CI tool with access to your repository.
When configuring a CI tool like Jenkins, you'll need to establish a connection between the tool and your code repository. This allows the CI tool to access your codebase and run automated tests or build processes whenever changes are pushed to the repository.
One common method for establishing this connection is to create a webhook. A webhook is a mechanism that allows a third-party tool, like a CI server, to be notified automatically when specific events occur in your repository, such as when a new commit is pushed or when a pull request is opened. When a webhook is triggered, the CI tool can automatically pull the latest code changes from the repository and initiate the build process.
To create a webhook in Jenkins, you'll need to follow these general steps:
- Open your Jenkins dashboard and select the project you want to configure.
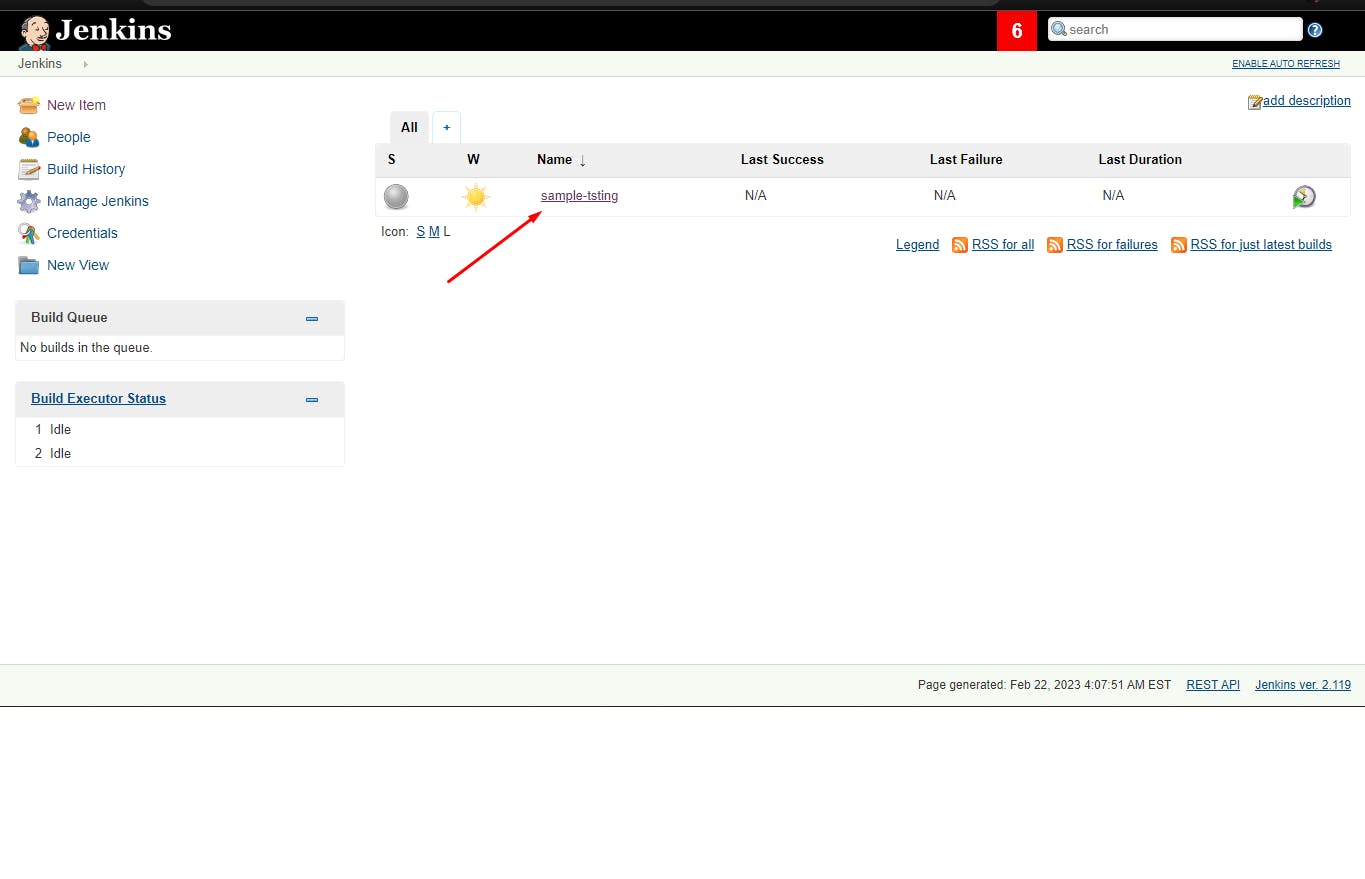
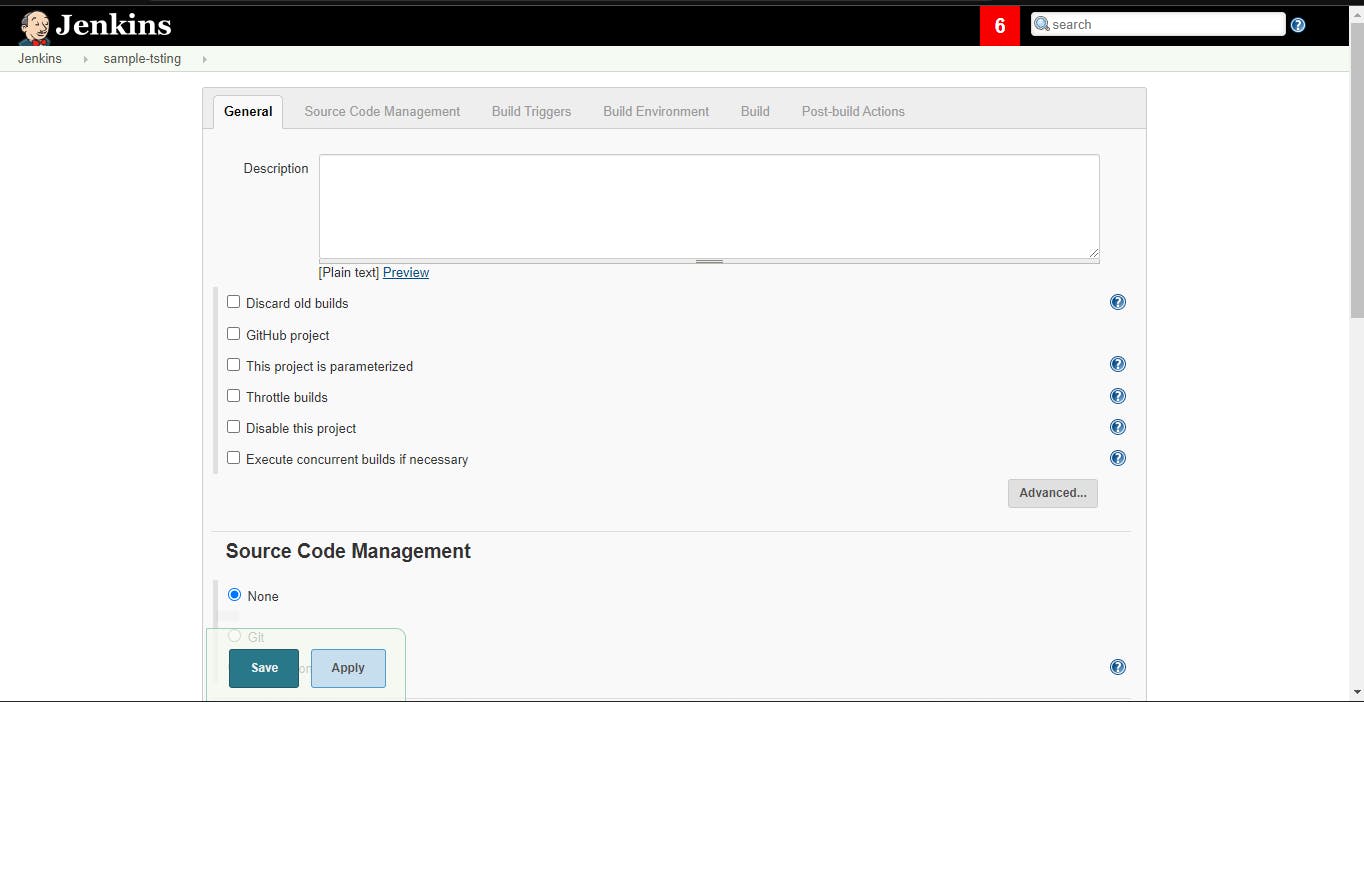
Click on the "Configure" button to edit the project's settings.
Scroll down to the "Build Triggers" section and select the "GitHub hook trigger for GITScm polling" option.
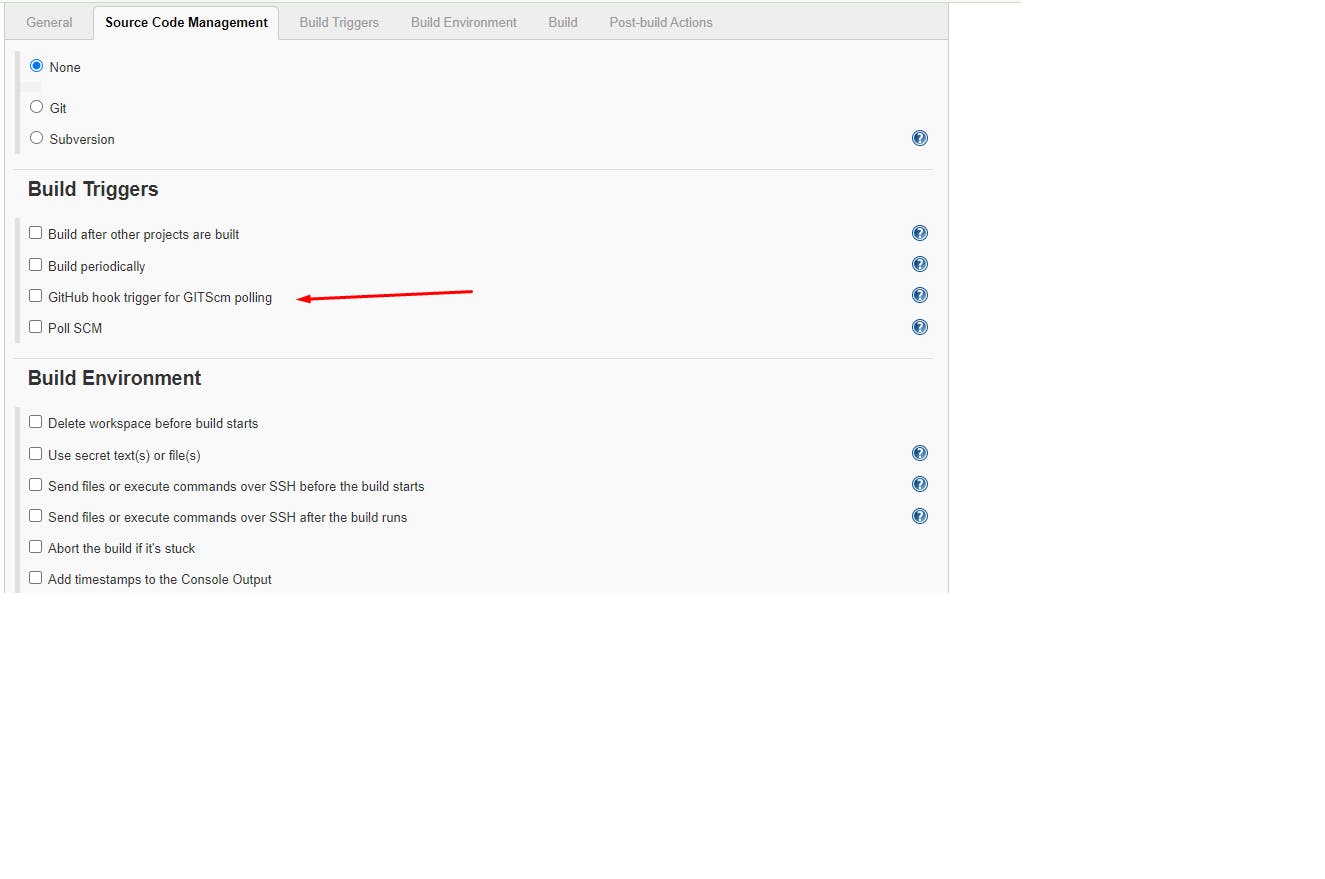
Save the changes.
Once you've created the webhook, Jenkins will automatically pull the latest code changes from your repository and initiate the build process whenever changes are pushed to the repository.
Alternatively, you can also provide the CI tool with access to your repository by providing it with appropriate credentials. This approach involves generating an access token or SSH key in your repository and then providing this information to the CI tool. Once the CI tool has the necessary credentials, it can access your repository and run automated tests or build processes as needed.
Here are the steps to provide Jenkins access to your GitHub repository using an access token:
Generate an access token:
Log in to your GitHub account and generate an access token that Jenkins can use to access your repository.
To do this, navigate to your account settings and click on "Developer settings".
Then, click on "Personal access tokens" and select "Generate new token".
Give the token a name and select the appropriate permissions for accessing your repository (e.g., read access to repositories).
Add the access token to Jenkins:
Once you have generated an access token, you'll need to add it to Jenkins.
Open your Jenkins dashboard and navigate to the project you want to configure.
Click on the "Configure" button to edit the project's settings. Scroll down to the "Source Code Management" section and select Git as the type of version control system.
Under the "Repository URL" field, add your GitHub repository URL and append the access token to the end of the URL using the following format:
https://<access-token>@github.com/<your-username>/<your-repo>
Save the changes:
- Once you have added the access token to Jenkins, save the changes to the project configuration.
Test the connection:
To ensure that Jenkins can access your GitHub repository using the access token, you can run a test build.
Make a change to your GitHub repository (e.g., create a new branch or make a code change) and push the changes to your repository.
Jenkins should automatically detect the changes and initiate a build process.
By providing Jenkins with an access token, you can enable the CI tool to access your GitHub repository and run automated tests or build processes as needed. Keep in mind that access tokens are sensitive information, so be sure to store them securely and avoid sharing them with unauthorized users.
Regardless of the method you choose, configuring your CI tool to connect with your code repository is a crucial step in setting up a robust CI/CD pipeline. By establishing this connection, you can automate the build process and ensure that your code is thoroughly tested before it is deployed to production.
Fourth Step:
Creating a Dockerfile
Creating a Dockerfile is a way to define the environment and dependencies required to run an application. The Dockerfile specifies instructions for building a Docker image, which is a lightweight, standalone executable package that includes everything needed to run the application, including code, libraries, and system tools. The Docker image can then be used to create one or more Docker containers, which are isolated, runtime instances of the image.
To create a Dockerfile for our to-do application, we'll first need to define the base image we want to use. This is typically an existing image from a public or private repository that includes the base operating system and runtime environment for our application. For example, we might choose to use the official Node.js image as our base image.
Next, we'll need to copy the source code for our to-do application into the Docker image and install any required dependencies using a package manager like npm or yarn. We'll also need to configure the container to expose the appropriate network ports so that we can access the application from outside the container.
Once we've defined the Dockerfile, we can use it to build a Docker image by running the docker build command. This command will read the Dockerfile and create a new image based on the instructions specified in the file. We can then use the docker run command to spin up a new container from the image, which will host our to-do application and all its dependencies.
By using Docker to containerize our application, we can ensure that it runs consistently across different environments and avoid issues with conflicting dependencies or configuration. Additionally, Docker makes it easy to deploy and scale our application, since we can simply create new containers from the same image and distribute them across multiple servers or cloud instances.
Below is the sample Dockerfile that can be used to run the application that we used
FROM node:12.2.0-alpine

WORKDIR app

COPY . .

RUN npm install

#runs the npm test

RUN npm run test

EXPOSE 8000

CMD ["node","app.js"]
Fifth Step:
Creating a build script:
it is an important step in automating the build process of your application. The build script should be a set of instructions that can be executed automatically to build your application from the source code.
Here are some of the common steps that might be included in a build script:
Cloning the repository: The script should start by cloning the source code repository from GitHub or another version control system.
Installing dependencies: The build script should install all the required dependencies needed to build the application. This could include installing specific versions of programming languages, compilers, libraries, and other tools that are needed for your application.
Building the application: Once all the dependencies have been installed, the script should initiate the build process. This might involve compiling source code, running tests, or packaging the application into a deployable format.
Running code quality checks: The build script should also run any code quality checks, such as linting or code formatting, to ensure that the code meets your organization's coding standards.
Creating artifacts: Once the build process is complete, the script should create any artifacts that will be used for deployment. This might include creating a Docker image or packaging the application into a ZIP file.
Publishing artifacts: Finally, the build script should publish the artifacts to a location where they can be accessed by other members of the development team or by a deployment pipeline.
By automating the build process with a build script, you can reduce the risk of human error and ensure that the build process is consistent and repeatable. This can help to speed up the development process and make it easier to deploy and manage your application.
Below is the sample build script:
pipeline {
    agent any

    stages{
        stage('Code'){
            steps{
                git url: 'https://github.com/<username>/<repo-name>.git', branch: '<branch-name>'
            }
        }
        stage('Build and Test'){
            steps{
                sh 'docker build . -t <dockerhub-username>/my-app1'
            }
        }
        stage('Push'){
            steps{
                withCredentials([usernamePassword(credentialsId: 'dockerHub', passwordVariable: 'dockerHubPassword', usernameVariable: 'dockerHubUser')]) {
                 sh "docker login -u ${env.dockerHubUser} -p ${env.dockerHubPassword}"
                 sh 'docker push <dockerhub-username>/my-app1:latest'
                }
            }
        }
        stage('Deploy'){
            steps{
                sh "docker-compose down && docker-compose up -d"
            }
        }
    }
}
Sixth Step:
Configuring CI to run the build script:
In the context of Jenkins, configuring the CI tool to run the build script is a straightforward process. Here are the steps you would typically follow:
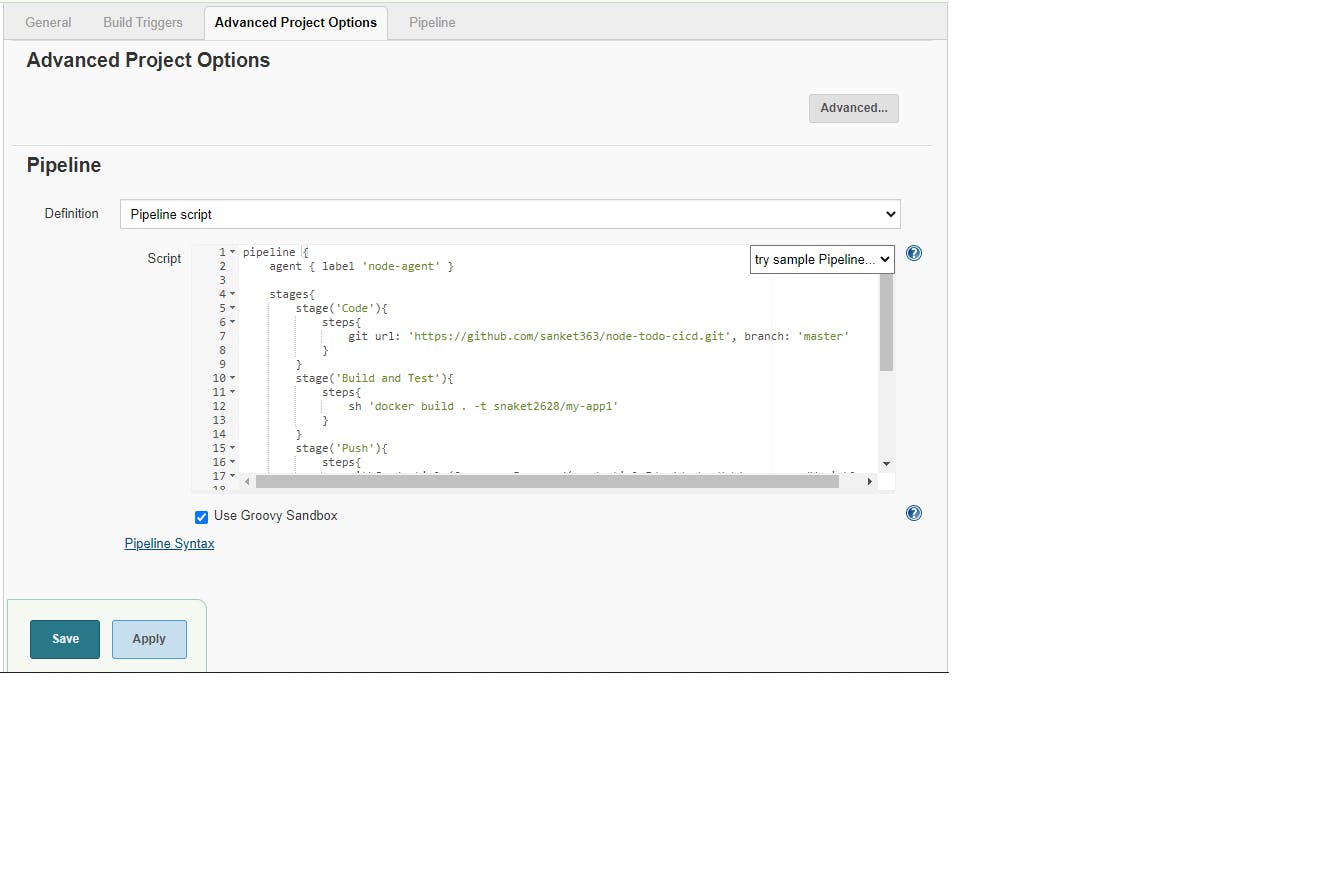
Create a new Jenkins job: Log in to your Jenkins instance and create a new job to run your build script. You can do this by selecting "New Item" from the main menu and choosing "Freestyle project" or "Pipeline" depending on your preference.
Note for the above script to use you need to select the "Pipeline" option and add the script there.
Configure the build trigger: In the job configuration page, configure the build trigger to automatically execute the build script whenever changes are pushed to the code repository. This can be done by selecting the appropriate option under the "Build Triggers" section, such as "Poll SCM" or "GitHub hook trigger for GITScm polling".
Define the build steps: Under the "Build" section, add a new build step to execute your build script. This could be a shell script, batch file, or any other type of script that can run on your build server.
Save and run the job: Once you have configured the job, save the changes and run the job to test that it is executing the build script correctly. You can also view the build output in the Jenkins console to troubleshoot any issues that may arise.
By configuring Jenkins to run your build script automatically, you can ensure that your application is always built and tested whenever changes are made to the code. This can help to catch issues early in the development cycle and ensure that your application is always in a deployable state.
Final Step:
The final step for setting up a CI/CD pipeline for a To-Do Application using Jenkins is to deploy the application to a production environment. This involves taking the artifacts that were created during the build process and deploying them to a server or cloud-based environment where the application can be accessed by users.
To deploy the application using Docker Compose, here are the high-level steps involved:
Define the Docker Compose file: Define a Docker Compose file that specifies the services required to run the application, including the application code, database, and any other dependencies. This file can be version-controlled alongside the application code.
Build the Docker images: Use the Dockerfile created in an earlier step to build the Docker images for the application and database. These images should be tagged with a version number or Git commit hash.
Configure the deployment tool: Configure the deployment tool to execute the Docker Compose file and deploy the application to the production environment. This can be done by creating a new deployment job in Jenkins or by using a Jenkins plugin that integrates with Docker.
Execute the deployment: Once the deployment tool is configured, execute the deployment job in Jenkins to deploy the application to the production environment using Docker Compose.
Monitor the application: After the application is deployed, monitor the environment for any issues or errors that may arise. This can be done by using monitoring tools that can provide insights into the performance and availability of the application.
Below is the simple docker-compose.yaml file:
version: '3'

services:
  web:
    build: .
    ports:
      - "8000:8000"
By using Docker Compose to deploy the application, you can ensure that the application is deployed consistently and reliably across different environments, and that any dependencies are included in the deployment process. Additionally, by automating the deployment process, you can reduce the risk of human error and improve the quality of the application.
Conclusion:
In conclusion, setting up a CI/CD pipeline for a To-Do Application using Jenkins is a complex process, but by following the step-by-step guide outlined above, you can streamline the development and deployment process, reduce errors, and improve the quality of the application.
By implementing a CI/CD pipeline, you can automate the build, test, and deployment processes, which can help you to quickly identify and fix any issues that arise during the development cycle. This can ultimately save you time and money, and improve the overall user experience of the application.
Through this guide, we have covered the key steps involved in setting up a CI/CD pipeline using Jenkins, including configuring the CI tool, creating a Dockerfile, writing a build script, and deploying the application using Docker Compose. By following these steps, you can create a highly efficient and automated development and deployment process that can help you to quickly iterate on your application and deliver high-quality software to your users.
Remember that the CI/CD pipeline is a continuous process, and you should always look for ways to improve and refine your pipeline over time. By continuously optimizing and iterating on your pipeline, you can ensure that your development and deployment processes are as efficient and effective as possible, and that your application continues to meet the evolving needs of your users.